



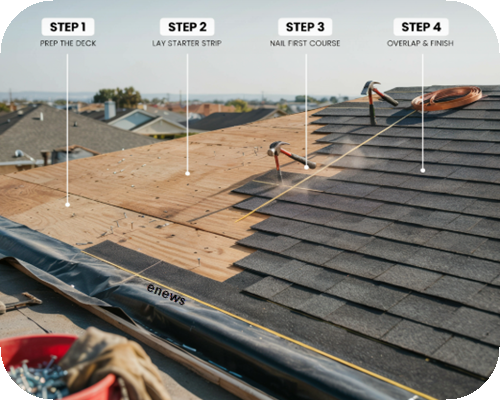
A shingle roof lasts because every layer works with the one below it. Water control starts at the deck, continues through flashings and underlayment, then ends at the ridge. Small errors can leave exposed fasteners, uneven courses, or moisture trapped where it should never sit. Seeing the full sequence helps homeowners and buyers judge workmanship more accurately and understand why careful installation matters long after the crew leaves.
Planning the Job
Sound roofing starts before a single bundle is opened. Installers check roof pitch, attic airflow, decking condition, local code rules, and the forecast because temperature and wind affect sealing. For readers who want a practical field reference, How to Install Roof Shingles gives added context on layout, materials, and sequence before the first line is snapped across the roof surface.
Checking Materials
Crews stage shingles, starter strips, underlayment, drip edge, flashing, ridge caps, nails, and sealant before tear-off begins. That count prevents delays and avoids rushed substitutions later in the day. Fastener size matters because nails must penetrate the sheathing to the required depth. Bundles also stay dry and flat so tabs remain straight, sealed strips stay clean, and color blending looks consistent once courses are installed.
Preparing the Roof Deck
Old roofing comes off down to bare sheathing so hidden damage cannot stay buried. Installers replace rotten panels, refasten loose sections, and remove raised nail heads or trapped debris. A smooth deck keeps courses aligned and helps sealing strips contact properly. Any soft spot left in place can flex under weight, break the shingle bond, and shorten the roof’s service life.
Adding Ice Protection
A self-adhering membrane is often applied at eaves, valleys, and other leak-prone areas where backed-up water can work under the roof covering. This layer seals around nail penetrations and adds protection where ice dams may form. Careful crews press it tight and keep overlaps true. Wrinkles, fishmouths, or open seams can create channels for moisture, even before shingles cover the surface.


Rolling Out Underlayment
Underlayment covers the main field and serves as the secondary water-shedding layer beneath the shingles. Sheets are run in straight rows, lapped correctly, and fastened according to the product instructions. A clean, flat install prevents ridges from telegraphing through the finished roof. Steeper slopes demand extra attention because loose material can shift quickly when gusts hit the exposed surface.
Installing Metal Edges
The drip edge protects the roof perimeter and helps direct runoff into the gutter instead of behind the fascia. Eave placement differs from rake placement because the surrounding layers overlap in a different order. Crews usually snap chalk lines at this stage as well. Early alignment matters, since a slight error near the bottom can become obvious several courses higher.
Setting the Starter Course
Starter shingles form the first sealed edge at the eave, where wind pressure is often strongest. Their adhesive strip helps lock down the lower ends of the first course. Installers keep this row level and offset it properly from the drip edge. If the starter wanders, each course above it follows that line, and the finished roof can look visibly out of square.
Laying the First Courses
The first full shingles are set over the starter and aligned with the chalk lines. Nail placement is critical because fasteners driven too high may miss the reinforced zone, while low nails can end up exposed. Crews also watch the reveal on every piece. Even a small change in exposure can affect appearance, sealing, and how efficiently water sheds down the roof plane.
Following the Stagger Pattern
Each course is offset from the row below so joints do not stack in the same vertical line. That stagger helps spread water flow and strengthens the roof against wind pressure. Installers cut the leading shingle in selected rows to maintain the required pattern. Manufacturer layout rules matter here, since the wrong offset can affect both appearance and warranty coverage.



Treating Valleys and Roof Openings
Valleys, vent pipes, chimneys, skylights, and sidewalls need extra attention because each one interrupts the shingle field. Flashing must overlap in the correct direction so runoff keeps moving down and away.
Flashing Details
Crews cut or weave valley shingles according to the chosen method, then fit flashing around each penetration with careful attention to lap order. Sealant supports these transitions, but it cannot replace proper metal placement. Counterflashing at chimneys and wall intersections is especially important. Those joints see concentrated water, and poor detailing there often leads to early leakage.
Conclusion
Proper shingle installation follows a clear sequence, and each stage supports long-term roof performance. Deck repair, membrane placement, underlayment laps, flashing order, nail location, and ridge finishing all matter. When those basics are handled with care, the roof sheds water cleanly, resists wind more effectively, and wears more evenly over time. Good results do not come from speed; they come from disciplined workmanship at every step.